This week we gathered at Karen Jacobs’ SC Test Kitchen for our biannual sushi night! SC Vegetarian Brown Rice Sushi is one of the most beloved SC recipes. It gives us the opportunity to be creative with vegetable combinations, test new ingredients and create personalized dishes.
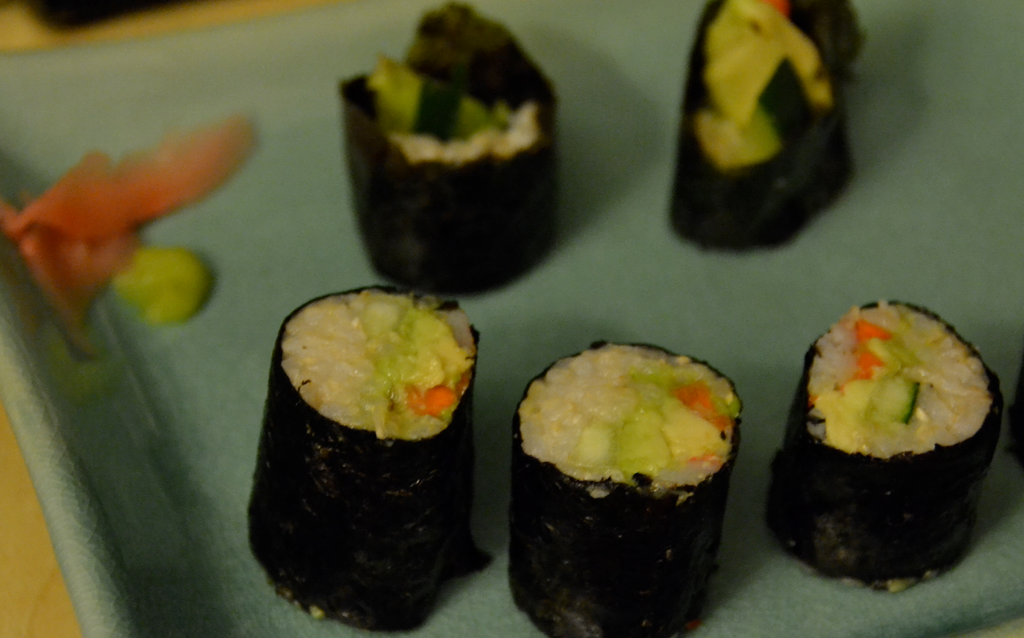
This week we experimented with the following ingredients and received wonderful reviews.
- Sweet potatoes
- Tofu
- Cucumbers
- Celery
- Carrots
- Avocado
- Sesame seeds
Here’s how we made our sushi rolls.
Sticky Brown Rice
Before we could begin rolling our sushi, we prepared the sticky brown rice. First, we followed the cooking directions on the bag and added rice vinegar and soy sauce to while it cooked. Later, the brown rice was transferred to a bowl and was tossed with vinegar.
The proper amount of rice vinegar is important for the rice to be sticky enough to bind and hold together a roll. Last semester, Karen advised that 2 Tablespoons of rice vinegar should be tossed with the every 2/3rds a cup of brown rice.
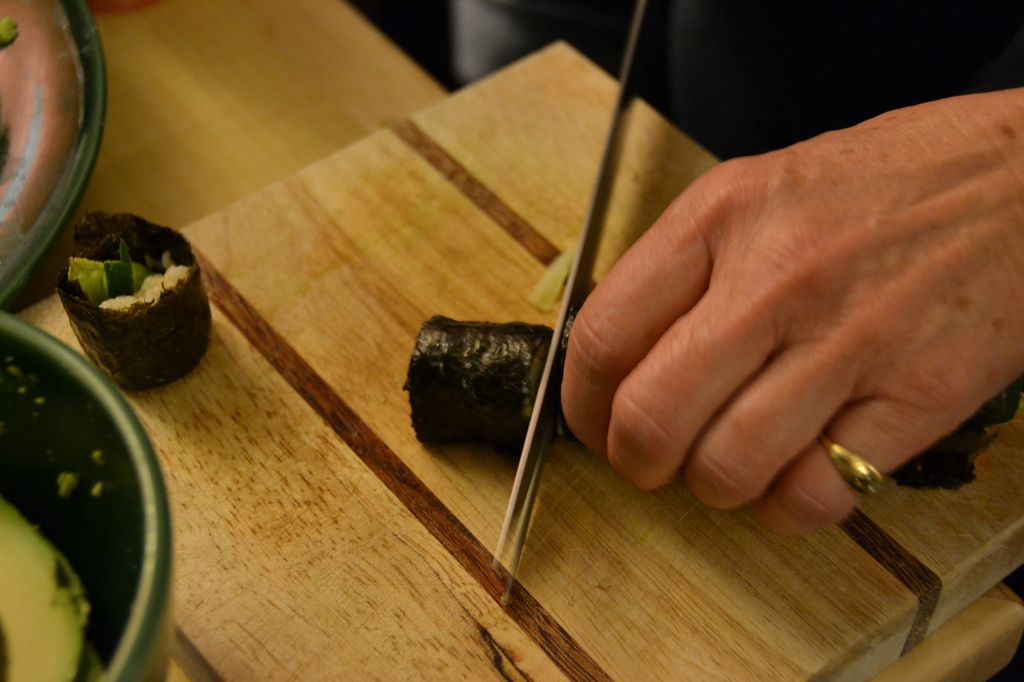
Rolling Away
1. We set the nori down with the shiny side face down.
2. Spread the brown rice evenly to create a 1 ¾ inch border.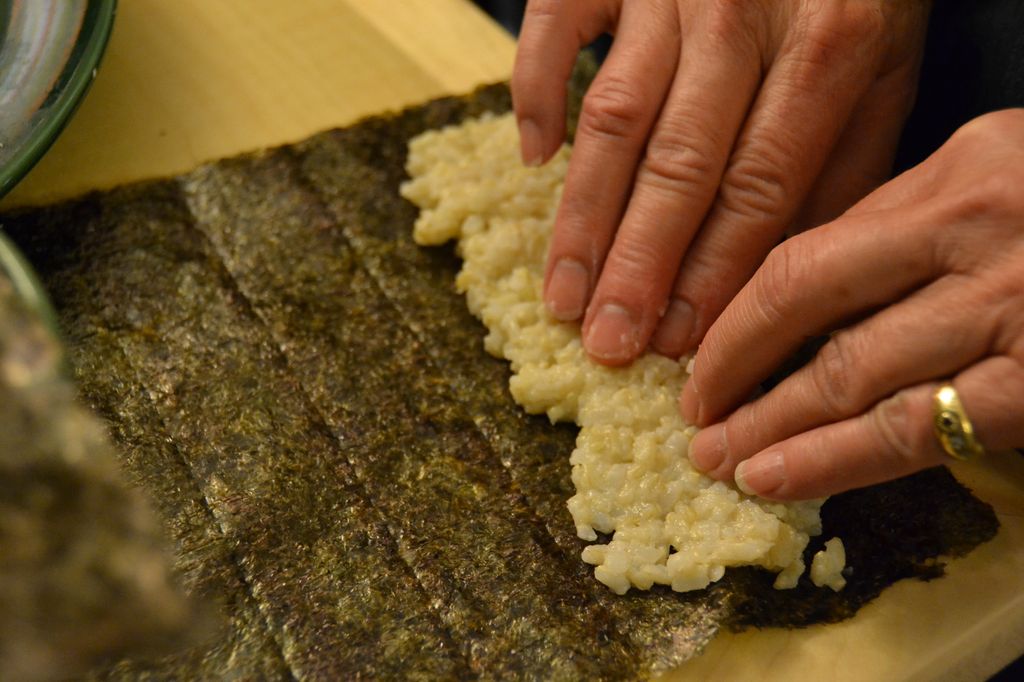
3. Next, we chose our ingredients and neatly stacked them on top of the brown rice.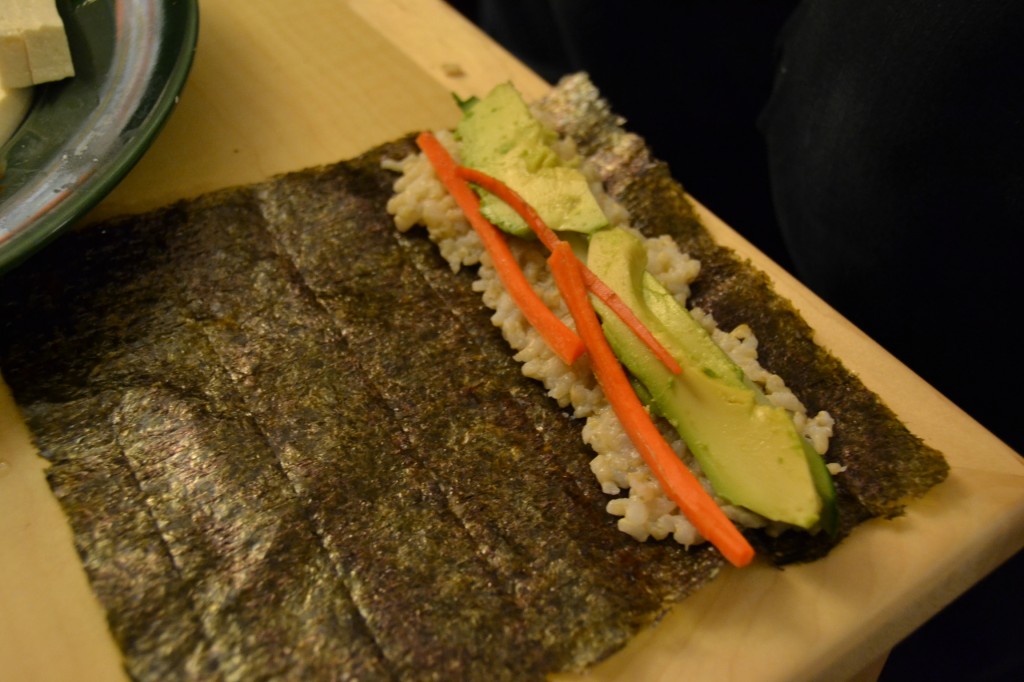
4. We gently, yet firmly tucked the edge of the roll in toward the bare side of the nori and continued to roll until it was tightly packaged.
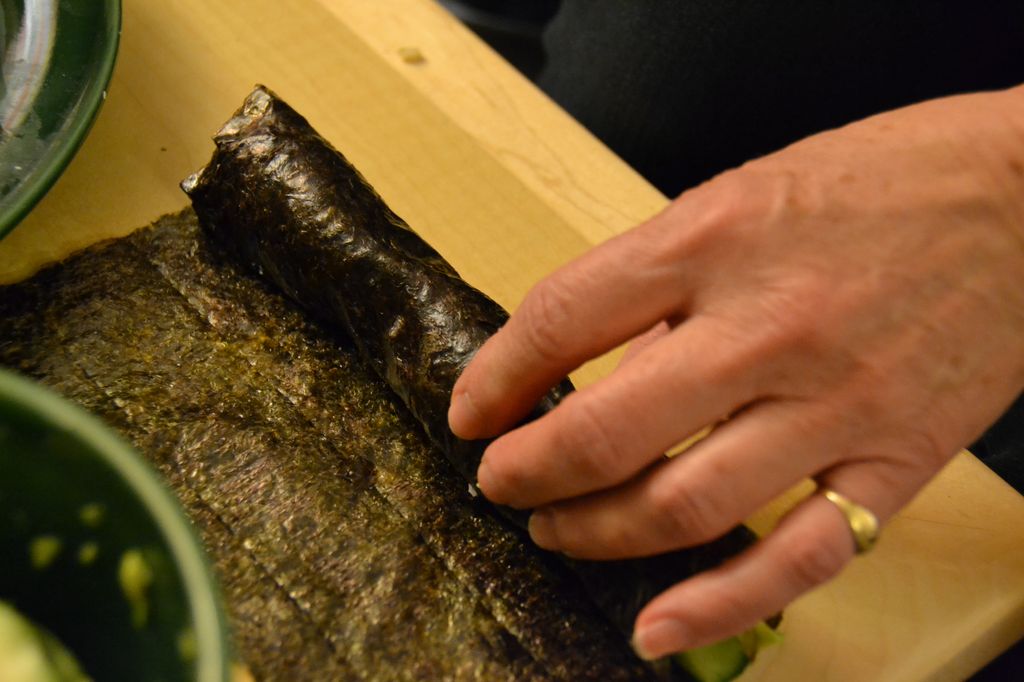
5. We dabbed some water on the ends of the nori to help seal the roll
6. Finally, we cut our sushi into 6 pieces and enjoyed with soy sauce and wasabi.
Take a look at last semester’s sushi night for more inspiration for your own rolls!
Sargent Choice Vegetarian Brown Rice Sushi
Yield 2 servings, 6 rolls each
Ingredients
2/3 cup dry short-grain brown rice
1-cup water
1-teaspoon water
2 teaspoons light soy sauce
2 tablespoons seasoned rice vinegar
1-teaspoon wasabi powder
2 (8 ¼ by 7 ¼ -inch) sheets roasted nori (dried layer)
½ Kirby cucumber, peeled, seeded, and cut into 1/16-inch thick matchsticks
½ medium carrot, cut into 1/16-inch-thick matchsticks
½ small California avocado, peeled and cut into thin slices
¾ ounces radish sprouts, roots trimmed
6 ounces firm tofu, cut into several long pieces
Directions
1. Prepare brown rice as directed with 1 teaspoon soy sauce
2. While rice is standing, stir together vinegar and remaining teaspoon soy sauce
3. Transfer rice to a wide, nonmetal bowl and sprinkle with vinegar mixture. Toss gently with a large spoon to combine. Cool rice, tossing occasionally, for about 15 minutes.
4. Stir together wasabi and teaspoon of water to form a stiff paste. Let stand for at least 15 minutes to allow flavors to develop.
5. Arrange 1 sheet of nori shiny-side down on a sushi mat lengthwise. With damp fingers, gently press half the rice onto the nori with a 1 ¾-inch border on the farthest edge.
6. Starting 1-inch from the side nearest you, arrange half the cucumber matchsticks, carrot matchsticks, avocado slices, and tofu pieces in an even strip horizontally across the rice (You may need to cut pieces to fit). Repeat with half the radish sprouts, letting some sprout tops to extend beyond the edge.
7. Roll the bottom edge of mat toward the top edge while holding the filling in place and pressing firmly to seal roll. Let stand for 5 minutes with the seam down and cut crosswise into 6 pieces with a wet knife.
8. Repeat steps 5-7 with the second sheet of nori.
| 1 Serving | |
| Calories | 250 |
| Fat | 10 g |
| Saturated Fat | 1.5 g |
| Protein | 12 g |
| Carbohydrates | 28 g |
| Fiber | 6 g |
3 Comments
Andrew posted on April 12, 2012 at 10:08 pm
Wow this looks so good!!!!!!!!!!!!
ideal protein diet posted on April 14, 2012 at 1:42 am
sushi is my favorite food. by looking at this images make me wants to make my own. I hope the taste and nutrient total rate are same like your review
distillery equipment posted on July 27, 2022 at 2:45 am
Thanks for sharing