Toupee vs Hair System Differences? Check This Article

Many individuals consider toupee and hair system options for hair loss. Some use these two solutions interchangeably, but they differ in aesthetics, durability, and application methods to meet different needs. Understanding the differences between toupees and custom hair systems is crucial. Their natural appearance, attachment methods, longevity, and cost are examined. Shunfa Hair aim to help you make an informed decision that fits your lifestyle and hair loss solutions goals as we explore non-surgical hair replacement, synthetic and real hair options, and innovative hair integration systems.

What are Toupees and Hair Systems?

Toupees and hair system are popular solutions for individuals who want to address hair loss, but they serve different needs. A toupee is a small hair piece or partial wig made of natural or synthetic hair that covers bald spots. Men seeking a simple, temporary solution to hair loss have traditionally used toupees. They fit snugly over the problem area and blend with the wearer’s hair.

A hair system is a more advanced and comprehensive non-surgical hair replacement method. In contrast to toupees, system hair prostheses can range from small pieces to a full scalp prosthesis, providing solutions for varying degrees of hair loss. Hair systems are customised to match the wearer’s hair colour, texture, and style for a natural look. These systems are attached to the scalp with special adhesives for a secure, daily-wear fit.

​From toupees to undetectable, long-lasting hair systems, non-surgical hair replacement has advanced greatly. Individuals can now have full heads of hair without surgery thanks to advancements in materials and attachment methods. Individuals now have access to hair loss solutions that can be tailored to their unique needs, ensuring confidence and comfort, whether they choose men’s toupees or custom hair systems.

Differences between a toupee and a hair system

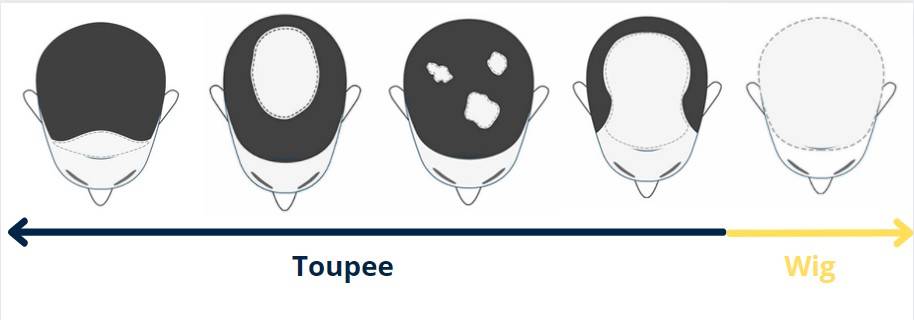
​Knowing the differences between a toupee and a hair system is essential when researching hair loss solutions. Coverage area is a major difference. A toupee is suitable for partial hair loss because it covers only specific bald spots or thinning areas. Individuals with extensive hair loss can use hair systems, which offer a wider range of coverage options, from partial to full scalp.

Differences between a toupee and a hair system

The materials used in both options also affect their appearance and feel. Long-term hair replacement with synthetic hair systems is affordable due to their durability and ease of maintenance. Real hair toupees mimic the wearer’s natural hair and allow for more styling flexibility.

The two differ further in customisation and fitting. Custom hair systems blend seamlessly with natural hair by accommodating the wearer’s scalp contours and hair colour, density, and texture. This customisation guarantees a comfortable fit and natural look. While available in various sizes and styles, standard toupees may not offer as much personalisation, resulting in a less natural look and feel.

Natural Look and Durability

In hair loss solutions, naturalness is key. This makes many wonder if toupees look natural like hair systems. Answer depends on hairpiece quality and customisation. Advanced technology and bespoke fitting allow hair systems to blend seamlessly with the wearer’s hair, creating a natural, undetectable look. To ensure a perfect fit, they match the wearer’s hair colour, density, texture, and scalp shape.

However, toupees have improved and can look natural when made of high-quality materials and fitted properly. Hair system customisation and coverage options give them an edge in achieving a more natural look.

Hair systems lead the way in durability. Carefully maintained hair systems can last months due to their durable materials and daily wear. Whether a hair system is made of synthetic or real hair affects its longevity. Real hair requires more maintenance but looks and feels more natural. Due to less advanced attachment methods and materials, toupees may last less and require more frequent replacements.

Both toupees and hair systems can help people with hair loss, depending on their needs for natural appearance and durability.

Attachment Methods​

Wearers of toupees and hair systems feel secure and confident in their daily lives thanks to improved attachment methods. Toupees are attached with double-sided tape or liquid adhesives. Tape or adhesive is applied to the toupee base and carefully placed on the scalp. This method requires precise application for a natural look and secure fit. To keep the toupee in place, reapply the adhesive or tape regularly.

However, hair systems use advanced techniques for permanent results. Bonding uses a medical-grade adhesive to attach the hair system to the scalp for weeks. This method creates a strong, undetectable bond for high activity without displacement. Another method is weaving or sewing the hair system into the wearer’s hair, which provides more security but requires adjustment as natural hair grows.

Scalp prosthesis is a key component of hair integration systems. This prosthesis is specifically designed to fit the wearer’s scalp, which has hair. Special adhesives attach the prosthesis to the scalp for a secure, natural-looking solution. This method provides full coverage and a seamless appearance, making it ideal for individuals who have experienced significant hair loss.

Each attachment method has advantages for different needs and preferences. Individuals can benefit from a secure, natural-looking hair replacement solution that improves their appearance and confidence, whether they choose to wear a toupee temporarily or a hair system or scalp prosthesis more permanently.

​Concerns about cost

Cost is a factor for many individuals when considering hair loss solutions. The materials, customisation, and attachment method make toupees and hair systems very different in price. Toupees cost less than hair systems upfront. This is because toupees use simpler materials and technologies and offer fewer customisation options. Their partial coverage design lowers their initial cost.

Hair systems require a larger initial investment. This is due to the high-quality real or synthetic hair, advanced technology, and personalised fitting and styling. Hair systems are seamless and natural because they match the wearer’s hair colour, density, texture, and scalp shape. The complicated process of designing and fitting a custom hair system raises its price.

However, cost must include long-term investments as well as initial costs. While cheaper at first, toupees may require more frequent replacements and maintenance, which can add up. With proper care, hair systems last longer and may be more cost-effective. A hair system may be more affordable over time for some individuals due to its durability and longevity, which can offset its higher initial cost.

A toupee or hair system should be chosen based on cost, lifespan, maintenance, and the value of a natural, confidence-boosting appearance. Individuals can make the best decision for their needs and budget by carefully weighing these factors.

Selecting Your Solution

The right hair loss solution depends on many factors, each of which is important for an individual’s needs. When choosing between a toupee and a hair system, lifestyle, hair loss, and budget all affect effectiveness and satisfaction.

Lifestyle is important; for individuals with active or physically demanding lives, a hair system may be preferable. Advanced attachment methods in these systems provide peace of mind and confidence during rigorous activities. However, toupees may be better for those seeking a less permanent option with more removal and maintenance options.

Another important factor is hair loss severity. Male toupees are designed for partial hair loss, such as crown thinning or receding hairlines, and may not suit extensive hair loss. Hair systems, such as scalp prosthesis and hair integration systems, can treat hair loss from complete baldness to varying degrees, so there’s a solution for almost every situation.

No budget should be ignored. High-quality toupees may cost less initially, but replacements and maintenance can be costly. Due to their customisation and durability, hair systems may cost more initially, but they may save money over time due to longevity and fewer replacements.

These factors, along with the desired appearance and how each option fits with aesthetic goals, must be considered when personalising your hair loss solution. Selecting men’s toupees for subtle enhancements or advanced hair integration systems for comprehensive coverage should support the wearer’s comfort, confidence, and lifestyle.

RGB vs RGBIC vs RGBWW: Illuminating the Differences

In the ever-evolving world of LED lighting technology, consumers are faced with a myriad of options, each boasting unique features and capabilities. Among the most popular choices are RGB, RGBIC, and RGBWW LED lights. While these acronyms may seem confusing at first glance, understanding the differences between them is crucial in making an informed decision when selecting the perfect lighting solution for your needs. In this comprehensive guide, we will explore the intricacies of RGB, RGBIC, and RGBWW LED lights, shedding light on their distinct characteristics and applications.

RGBWW 5 in 1 LED Lighting Strip

Picture source: RGB vs RGBIC vs RGBWW

Understanding RGB LED Lights

RGB LED lights are the foundation upon which more advanced LED lighting technologies are built. The term "RGB" stands for Red, Green, and Blue, representing the three primary colors that these lights utilize to create a wide spectrum of hues. By adjusting the intensity of each color, RGB LED lights can produce millions of different shades, allowing for a highly customizable lighting experience.

One of the main advantages of RGB LED lights is their versatility. They can be used in a variety of settings, from home decor and gaming setups to commercial spaces and event lighting. RGB LED lights are also relatively affordable compared to more advanced options, making them a popular choice for those on a budget.

The Evolution of RGBIC LED Lights

RGBIC LED lights take the concept of RGB lighting to the next level by incorporating an integrated circuit (IC) chip into each LED. This innovative technology allows for individual control over each LED, enabling the creation of intricate, multi-colored patterns and effects that are not possible with traditional RGB LED lights.

With RGBIC LED lights, users can enjoy a more dynamic and immersive lighting experience. Each LED can display a different color simultaneously, resulting in stunning gradients, mesmerizing animations, and seamless color transitions. This level of control opens up a world of possibilities for creative lighting designs in both residential and commercial settings.

The Warmth of RGBWW LED Lights

RGBWW LED lights introduce an additional dimension to the color palette by incorporating warm white (WW) LEDs alongside the standard RGB LEDs. The inclusion of warm white LEDs allows for the creation of more natural and inviting lighting atmospheres, mimicking the cozy ambiance of traditional incandescent bulbs.

The warm white LEDs in RGBWW lights emit a color temperature around 2700-3000K, which is similar to the warm glow of candlelight or sunset. This makes RGBWW LED lights particularly well-suited for creating relaxing and intimate environments, such as bedrooms, living rooms, or restaurants.

RGBIC vs RGBWW: A Comparative Analysis

When it comes to choosing between RGBIC and RGBWW LED lights, it ultimately depends on your specific needs and preferences. RGBIC LED lights offer unparalleled control over individual LEDs, allowing for the creation of captivating, multi-colored displays. This makes them ideal for gaming rooms, home theaters, or any space where you want to make a bold statement with your lighting.

On the other hand, RGBWW LED lights prioritize the inclusion of warm white LEDs, providing a more natural and inviting ambiance. If your primary goal is to create a cozy and comfortable atmosphere, RGBWW LED lights are the way to go. They are perfect for living spaces, bedrooms, or any area where you want to unwind and relax.

It's worth noting that both RGBIC and RGBWW LED lights offer a wide range of colors and customization options. However, RGBIC lights excel in creating dynamic, eye-catching effects, while RGBWW lights focus on delivering a more balanced and natural lighting experience.

Conclusion

In the battle of RGB vs RGBIC vs RGBWW LED lights, there is no clear winner. Each technology has its own unique strengths and applications, catering to different preferences and requirements. RGB LED lights provide an affordable and versatile solution for those seeking a wide range of colors, while RGBIC LED lights offer unmatched control and creativity with their individually addressable LEDs. Unitopledstrip RGBWW LED lights, on the other hand, prioritize the inclusion of warm white LEDs for a more natural and inviting ambiance.

Ultimately, the choice between RGB, RGBIC, and RGBWW LED lights depends on your specific needs, budget, and desired lighting atmosphere. By understanding the differences between these technologies and considering your priorities, you can make an informed decision and select the perfect LED lighting solution to elevate your space in 2024 and beyond.

How to Propagate Peonies from Seed?

Introduction

Peonies are known for their large and extravagant blooms. People often propagate them by division. But can you grow peonies from seed? We will provide steps on how to grow peony from seed.

Understanding Peony Seeds

  1. What Do Peonies Seeds Look Like?

Peony seeds are shiny, dark purple to black. They have different shapes, from plump, wedge-like to oblong. Peony seeds are usually found within the fruit of the peony. Peony seeds develop after the flowers are pollinated.

Upon harvesting, you'll notice a coating on the seeds. You need to scarify or break this coating to encourage germination. Peony seeds are not quick to sprout. Some may remain viable for years before they decide to grow.

  1. Three Main Types of Peonies

Herbaceous peonies: The most common type, they die back in winter. Leave stumps above ground. These will regenerate the following spring.

Tree peonies: Woody shrubs that maintain their structure year-round. They often produce large and vibrantly colored blossoms.

Intersectional peonies (or Itoh peonies): A hybrid of the two main types. They offer the best of both in terms of hardiness and bloom strength.

Harvesting Peony Seeds

  1. When to Harvest Peony Seeds?

Seeds are ready for harvest when the peony blooms have faded. The seed pods begin to dry and crack open. This typically occurs in late August to early September.

  1. The Harvesting Process

When seed pods start to split, use scissors to cut the pod from the plant. Take care not to damage the seeds. Collect the pods in a paper bag. Leave them in a warm, dry space to finish drying.

  1. Maturation Is Key

Ensure the seeds are fully matured before harvesting them or attempting to grow them. This means leaving the seed pods on the plant until the seeds inside have turned from white to a brownish-black color. For peonies, patience is definitely a virtue. The seeds may take a few months to mature.

When the time is right, each seed will be smooth, round, and firm. If the seeds are wrinkled, mushy, or damaged, they won't germinate. So give them a gentle squeeze to test their vigor before storing them in a cool, dry place.

Preparing for Planting

  1. Clean and Dry Peony Seeds

Before planting peonies from seed pods, you should clean and dry the seeds. Rinse them thoroughly to remove any pulp or debris. Then, laying them out to dry in a cool, dark place. Any excess moisture can lead to mold and seed rot, so drying is essential.

  1. Stratification

Refrigeration Method: Place seeds in a moistened medium. For example, peat moss or a paper towel. Seal it in a plastic bag. Keep the bag in the refrigerator for about three months. Check occasionally for moisture levels and potential mold.

Outdoor Method: For the more daring gardener, outdoor stratification involves planting the seeds directly in the garden in the fall. The seeds will experience the cold temperatures required. But be mindful of animals that might disturb the soil.

  1. Scarification for Better Germination

Peony seeds have a hard outer shell that can inhibit germination. Scarifying the seeds (making small nicks on the seed coat) can significantly improve germination rates. This can be done carefully with a sharp blade.  Soak the seeds in warm water for 24 hours.

How to Grow A Peony from Seed?

  1. Soil Preparation

Peonies appreciate well-draining soil. So a mix of one part peat, one part perlite, and one part sterilized soil is an ideal combination. Ensure your soil is slightly acidic, with a pH level between 6.5 and 7.0. Use plastic garden pots with drainage holes to prevent waterlogging. Because peony seeds are particularly averse to.

  1. Peony Planting Time

The best time to plant peony seeds is in late autumn or early winter. Take advantage of the natural cooling and expansion that this season brings.  These changes are necessary for breaking the seed dormancy.

  1. How Deep to Plant Peony Seeds?

Planting tree peony seeds no deeper than twice their diameter. A half inch to one inch in a planting medium is sufficient. Peonies seedlings don't appreciate competition. So space your seeds about 6 inches apart.

  1. How to Germinate Peony Seeds?

After sowing peony seeds, water them lightly to settle them in. Cover the two gallon pot with a plastic bag. Maintain moisture and provide a stable environment for germination. Keep the containers at a temperature of around 40 to 50 degrees Fahrenheit. This simulates the cold stratification peony seeds require.

2 gallon nursery pots

Caring for Peony Seedlings

  1. Optimal Growing Conditions

Peonies prefer full sun but can tolerate partial shade. They're not too picky about soil pH, as long as it's well-draining. Check the moisture regularly. Keep the soil consistently moist but not waterlogged.

  1. Watering Seedlings

Peony seedlings are particularly sensitive to overwatering and damping off. It is a fungal disease that causes young seedlings to collapse and die. To prevent this, water from the bottom of the pot. Place it in a saucer of water. Allow the soil to soak up moisture.

  1. Fertilizing Seedlings

When the seedlings have grown a bit and appear stronger, you can begin fertilizing. You can use a balanced fertilizer or compost tea. This encourages healthy root development and overall growth.

Transplanting Seedlings

  1. When to Transplant Seedlings in Pots?

Seedlings will typically be ready for transplanting about six to eight weeks after germination. Look for roots starting to come out of the drainage holes at the bottom of the 3 gallon plastic pots. A larger pot with ample room is necessary.

  1. Instructions for Transplanting Seedlings

Carefully slide the seedling out of its current pot, soil and all. If the roots are heavily compacted in the shape of the pot, gently tease them apart to encourage outward growth. Plant the seedling in its new container or garden bed at the same level it was before. Water the plant well to settle the soil around the roots.

  1. Tips for Minimizing Transplant Shock

Keep the soil around the seedlings moist in the days leading up to the transplant. Try to transplant on a cloudy day or in the evening. This can minimize the shock from direct sunlight.

After transplanting, place the plants in a location with diffused light. You should also protect them from the wind. Water the transplants regularly to keep the soil moist but not waterlogged.

Continued Care and Maintenance

  1. Care for Young Peony Plants

The roots of peonies are sensitive to waterlogging. Water deeply but infrequently. Allow the soil to dry out between watering to avoid root rot.

Peonies are not heavy feeders. But an annual application of a balanced fertilizer in early spring can boost their growth and flowering potential.

Keep an eye out for pests and address any issues promptly. Organic pest control methods are often the safest for your plants and the environment.

  1. Supporting Peony Growth

Large peony blooms can be heavy. Sometimes this may cause the plant to lean or break. Providing support can prevent this and maintain the plant's aesthetics. For example, stakes.

  1. Winter Protection

In cold climates, a layer of mulch around the base of your peony plant can protect it from the harshness of winter. This is especially important for young plants. They also retain soil moisture and deters weeds.

  1. How Long Does It Take to Grow Peonies from Seed?

Growing peonies from seed may take about 3-5 years. Most peony seeds will sprout in the spring of the first season. But some may take a second year.

Conclusion

Now you know how to plant peonies from seed. The process may take longer than other propagation methods. But the reward is an unparalleled experience for you.

The Ultimate Guide to Growing Foxglove from Seed

Introduction

We will discuss the essential steps to successfully grow digitalis from seed. You will have a clear pathway to cultivating a flourishing foxglove garden patch.

Selecting Seeds

  1. Choosing Reputable Seed Suppliers

When sowing foxgloves, the first hurdle is finding quality seeds. You should look for suppliers with a known track record for providing healthy and viable seeds. Look for reviews and feedback from other gardeners to ensure you're making a sound investment.

  1. Foxglove Seed Varieties

Foxglove growing zones are in USDA hardiness zones 4–9. Consider the different varieties of digitalis, the genus for foxglove. There's a range of foxglove species and cultivars. Each with unique colors, sizes, and growing habits.

For example, Digitalis purpurea has the classic purple and white flowers. However, Digitalis grandiflora boasts creamy-yellow blooms. It prefers a more humid climate.

  1. Selecting the Best Seeds for Your Garden

Avoid seeds that are discolored, misshapen, or damaged. Instead, choose seeds with plump, uniformly sized, and have a consistent color. Healthy seeds are more likely to germinate and grow into robust plants.

Also, if you have the chance, select organically-grown seeds. They often result in healthier plants with higher resistance to pests and diseases.

Preparing for Planting

  1. When to Plant Digitalis Seeds?

The best time to plant foxglove seeds is from late spring to early summer. Sowing foxglove seeds when the weather is cool. This gives the plants a chance to establish before winter. They thrive when a natural cycle of frost can break their dormancy. This leads to stronger plants come springtime.

  1. Preparing the Soil

Your foxgloves-to-be will appreciate light, well-drained soil. Amend your garden bed with organic matter and a bit of sand if the soil is heavy or prone to puddling. Foxgloves prefer moisture but detest sitting in soggy soil. Test the pH of your planting site. They prefer slightly acidic soil with a pH level 5.5-6.5.

  1. Tools and Materials

Gardening gloves, a trusty trowel, and good watering are your best friends when propagating foxgloves from seed. Foxglove seeds are small. So having a dibber or something with a small tip. This can make seed planting more precise.

How to Grow Foxglove from Seed?

  1. Direct Sowing vs. Starting Indoors

When you're ready to plant, you have two main options: direct sowing into the garden or starting seeds indoors. Direct sowing simplifies the process. While growing foxglove from seed indoors with controlled conditions can lead to stronger plants.

Direct sowing is as simple as broadcasting seeds on prepared soil and lightly covering them. Indoors, sow the fine seeds on moistened, sterile seed starting mix. Cover the plastic seed tray to retain moisture until germination.

XQ 15 cells seedling trays

  1. How to Plant Foxglove Seeds?

Whether indoors or out, ensure the soil is well-drained. Keep it consistently moist but not waterlogged. Germination can take from a few weeks to over a month. Once foxgloves seedlings are a few inches tall, thin to the strongest plants.

  1. Tips for Foxglove Germination

For the greatest success, use bottom heat mats if germinating indoors. Ensure a good source of bright, indirect light. Consider using a fungicide to prevent 'damping off'. This disease can attack your seedlings.

When the seedlings have their first set of true leaves, transplant them to large plastic nursery pots. After the last frost of spring, acclimate the plants to outdoor conditions. Then plant them out.

Caring for Foxglove Seedlings

  1. Watering Techniques

Continue with the misting method for young seedlings. They have tender roots, and strong streams of water can uproot them. Water in the mornings. The foliage will have time to dry off during the day. This reduces the risk of fungal diseases.

  1. Fertilizing Strategy

After the first true leaves appear, apply a diluted, balanced liquid fertilizer. Follow the manufacturer's instructions for the correct dosage. Avoid getting the fertilizer on the leaves to prevent them from burning.

  1. Pest and Disease Management

Keep a watchful eye for pests and diseases. For example, slugs and powdery mildew. If identified, treat the issue promptly with appropriate solutions. These may include organic insecticidal soaps or neem oil for pests and a fungicide for diseases.

Transplanting Seedlings

  1. Determining Seedling Readiness

Timing is critical when transplanting foxglove seedlings. Foxglove germination time is 14-21 days at 65-70°F (18-21°C). Typically, after foxglove seed germination, you should thin out seedlings when they have their first true set of leaves.

This usually occurs around 10-12 weeks after sowing. The seedlings should have at least four to five mature leaves before transplanting them into the garden. You may need to transplant earlier if seedlings are larger or growing faster.

  1. Soil Preparation and Spacing

Do foxgloves need full sun? Foxgloves prefer moist, well-drained soil and partial shade. Prepare the transplant site by enriching the soil with organic matter. For example, compost or well-rotted manure. Ensure the pH level of the soil is slightly acidic for the best growth.

How tall do foxglove grow? Spacing should accommodate the plant's future size. Mature foxglove plants can reach 2-5 feet in height, with a spread of 1-2 feet. Space the plants 1.5-2 feet apart. This prevents overcrowding, which can lead to disease.

  1. Transplanting Techniques

Gently remove the seedlings from 1.5 gallon nursery pots. Trying to disturb the root system as little as possible. If roots are circling the pots, lightly tease them out before planting.

Dig a hole in the prepared soil slightly larger than the root system of the seedling. Place the plant in the hole. Ensure the crown (where the leaves meet the roots) is at soil level. Pat the soil gently around the seedling. Water thoroughly to help settle the soil.

Transplant in the late evening or a cloudy day to minimize transplant shock. Morning is also a good time. The plants have the entire day to recover before temperatures cool in the evening.

Transplanting seedlings earlier in the day may be stressful. The sun can exacerbate water loss and dehydration. Use a trowel for best results. Try not to transplant during windy days or in muddy soil conditions.

Foxglove Maintenance

  1. Watering and Fertilizing Established Plants

Established foxglove plants should be watered during dry periods to keep the soil moist but not saturated. An annual feeding in early spring with a balanced fertilizer will help them maintain their strength.

  1. Mulching to Conserve Moisture

Mulching can help conserve soil moisture and reduces the competition from weeds. It also keeps the plants' roots cool in the summer.

  1. Providing Support for Tall Varieties

Tall foxglove varieties can benefit from staking to support their height, particularly in windy locations. Make sure the stakes are placed when the plants are young. This can avoid root damage later.

Harvesting Foxglove Seeds

  1. When Seed Pods Are Ready for Harvesting?

A mature seed pod will feel dry and should be just starting to crack open. Squeeze gently to ensure they're ready for harvest. If the pod bursts open easily, it's time to collect the seeds.

  1. Harvesting Techniques

To harvest, gently pinch the seed pod at its base and pull it off the stem. Use a paper bag or tray to catch seeds as you work to avoid losing any.

  1. Storing and Saving Foxglove Seeds

After harvest, ensure the seeds are completely dry before storing. Lay them out on a paper towel in a well-ventilated area for a few days. Once dry, store the seeds in a cool and dark place. For example, a paper envelope. Properly stored, foxglove seeds can remain viable for several years.

Conclusion

Propagating foxgloves from seed allows you to control and observe the entire life cycle of digitalis plants. With this guide, your garden will soon be home to these regal, natural works of art.

Azalea Leaves Turning Yellow: Causes and Remedies

Introduction

Different factors can cause azalea yellow leaves. Here are some common reasons why your azalea leaves might be turning yellow. Proper identification of the underlying cause can save your plant.

Why Are My Azalea Leaves Turning Yellow?

Environmental Factors

Sunlight Exposure and Sunburn: If your azalea in fabric grow bags is suddenly exposed to high-intensity light, the leaf tissue may become scorched. This can result in azalea leaves turning yellow with brown spots.

Watering Issues: Overwatering can lead to root rot, which in turn causes a reduction in the plant's ability to take up water and nutrients. This can lead to yellow leaves on azaleas. Underwatering, on the other hand, can deprive the plant of essential moisture and nutrients.

Soil pH Imbalance: Azaleas thrive in acidic soil with a pH range of 4.5 to 6.0. Any discrepancy in this range and the soil’s alkalinity can lock up essential nutrients. For example, iron. This prevents the azalea from taking them up. This often manifests in yellowing between the veins of the leaves, while the veins themselves remain green.

Pests and Diseases

Azalea Lace Bugs: These tiny pests can cause stippling on the leaves. This appears as tiny, white or yellow spots. These can lead to the yellowing of the foliage over time.

Fungal Diseases: Various fungi can attack azaleas. They cause symptoms like leaf wilting, leaf spot, and yellowing. Root rot is another common fungal issue. Overwatering or poorly drained soils caused it.  This can lead to yellow azalea leaves and overall wilting of the plant.

Nutritional Deficiencies

Lack of essential nutrients: A healthy azalea requires a balance of nutrients to maintain its vibrant green color. Key nutrients like nitrogen, iron, and magnesium are particularly crucial. A lack of any one of these can manifest in azalea yellow leaf. Sometimes accompanied by visible changes in the veins or a more general paleness in the leaf color.

Poor soil quality: The soil pH also comes into play. Azaleas thrive in acidic soils, and when it rises, critical nutrients may become less available for the plant to uptake. Poor soil quality can exacerbate these issues. It can hinder the plant's ability to draw up essential nutrients from the plastic flower pots soil.

Diagnostic Steps

Visual Inspection

Uniform Yellowing: This often points to a broad environmental or systemic nutrient issue. Azaleas with yellow leaves are possibly soil health, or watering habits.

Patch Discoloration: Fungal or bacterial infections might be at play. Particularly if the spots are ringed with irregular margins.

Wilting or Weakness: Common pests can lead to azalea leaves turning yellow and falling off. For example, lace bugs or scales. They leave telltale signs if you look closely, often on the undersides of the foliage.

Soil Testing

pH and Nutrient Levels: Azaleas are particular about their soil environment. An alkaline soil pH can inhibit nutrient uptake. This leads to iron or nitrogen deficiencies. A lack of them can lead to yellow leaves on azaleas.

Home Tests: At-home soil test kits are an accessible tool for gardeners to monitor pH and nutrient levels. While not as precise as professional analysis, they can highlight major imbalances.

Professional Assessment: For serious cases or if multiple plants are affected, a laboratory soil test can provide actionable insights. They can offer detailed recommendations for amendments and care.

Treatment and Prevention

Environmental Management

Adjusting sunlight exposure: Azaleas prefer dappled shade or locations with morning sun and afternoon shade. Direct sunlight during the hottest part of the day can cause stress and lead to azalea yellow leaves. Adding shade cloth or other materials to create a shade structure during the peak sun hours.

Prune back nearby trees or bushes that may be shading them too much. Similarly, remove branches or leaves that could be casting too much shade on your azalea.

Proper watering techniques: Water in the morning to ensure foliage dries off before cooler evening temperatures. Use a soaker hose or watering can to deliver water directly to the soil. Check the soil moisture by inserting a finger or a moisture meter into the soil. This avoids over or under-watering.

Soil Amendments: Apply sulfur or other acidifying agents to lower the soil pH gradually over time. Mix in organic matter like peat moss to improve drainage and maintain acidity. Regularly test the pH of your soil and adjust as necessary. This can provide the best growing conditions for azaleas.

Pest and Disease Control

Organic and chemical options: Organic controls can be effective against many common azalea pests, without harming beneficial insects. For example, neem oil or insecticidal soaps.

For a more severe infestation, chemical insecticides can provide targeted intervention. Be sure to apply according to the manufacturer's guidelines and with the appropriate safety measures.

Preventing Fungal Diseases: These often take hold in humid environments with poor air circulation. To prevent these issues, ensure proper spacing between plants. Proper pruning techniques can also encourage air flow.

Water azaleas in a 20 gallon pot at the base to keep foliage dry. This reduces the risk of fungal spores taking hold. You can use fungicides to preventatively during wet seasons or when humidity is high.

20 gallon garden pot

Nutritional Supplements

Fertilization schedules: Typically, azaleas benefit from a feed in early spring, after flowering, and again in late spring or early summer. This ensures they have enough nutrients for both flowering and leaf growth.

Recommendations: Choose a fertilizer formulated for azaleas, camellias, and rhododendrons.  Make sure it is rich in nitrogen for green leaves, phosphorus for blooms, and potash.

Balanced fertilizers: Azaleas need a mix of macronutrients (nitrogen, phosphorus, potassium) and micronutrients (iron, magnesium, zinc, etc.). A soil test can verify if additional micronutrients are needed.

Maintenance Practices

Regular inspection: Monitor your azaleas weekly for pests, diseases, and nutrient deficiencies. Early detection can prevent significant issues.

Maintenance routines: Prune dead or yellowing branches and spent blooms regularly to promote new growth. Thoroughly clean up fallen leaves from around the plant. This prevents the spread of disease.

Mulching and weed control: Apply a layer of organic mulch around the base of your azalea. For example, pine needles or wood chips. This can retain moisture in the soil, regulate soil temperature, and prevent weeds that compete for nutrients.

Conclusion

By addressing these common issues, you can successfully combat azalea leaves turning yellow. This ensures a beautiful and healthy garden.

A Complete Guide to Growing Passion Fruit in Pots

Introduction

Growing passion fruit in pots is an exercise in both patience and ingenuity. Here’s how to grow passion fruit in pots, and harvest your vine-to-table experience in no time.

Selecting the Right Pot and Soil

  1. Container Size

The first step to growing passion fruit in pots is to select the right container. You can choose 5 gallon plastic pots or 7 gallon plastic pots. Passion fruit plants thrive in large containers. They can provide ample space for their root system to expand.

5 gallon plastic pots

  1. Ideal Potting Mix

The quality of the potting mix is paramount for the health and productivity of your passion fruit. A well-draining soil mix that's rich in organic matter is excellent. For example, compost or peat moss. The pH level should hover between 5.5 and 6.5, slightly on the acidic side.

  1. Importance of Drainage

Passion fruit vines abhor wet feet. Always choose pots with drainage holes. Consider adding a layer of gravel at the bottom of the pot to enhance drainage further. Before growing passionfruit in a pot, ensure the mix is moist but not waterlogged. This allows the excess moisture to escape easily.

Choosing the Perfect Passion Fruit Variety

  1. Passion Fruit Varieties Suitable for Container Gardening

Not all passion fruit varieties are well-suited for life in a pot. You should choose the right one when growing passion fruit in containers. For container gardening, look for dwarf or bush varieties that don't have extensive root systems.

The Frederick and Possum Purple cultivars are excellent choices. They have compact growth and bountiful fruiting even in restricted spaces.

  1. Climate and Local Conditions

Climate plays a significant role in the viability of passion fruit plant in pot. If you experience harsh winters, you may need to bring the plant indoors or protect it from frost. Conversely, too much heat can cause problems.

Passionfruit vine in pot can be sensitive to environmental changes, especially in its early stages. So consistent conditions are important to help your vine grow strong and healthy.

How to Grow Passion Fruit in Pots?

  1. Planting from Seeds

Begin with a good quality seed. This sets the foundation of your passion fruit plant's health and productivity. Fill your 7 gallon pots three-quarters full with the potting mix.

Plant the seed about 1 inch deep in the center. Cover with potting mix and lightly tamp it down. Water gently, keeping the soil moist but not waterlogged. Place the pot in a warm, sunny location. Wait for germination in two to four weeks.

  1. Planting Seedlings

Choose a 6 to 10-week-old seedling or cutting from a reputable source. Dig a hole in the center of your potting mix. Make sure it is deep enough to cover the root ball without burying the stem.

Gently place the seedling in the hole. Ensure the soil level around the stem is the same level as it was in the pots. Backfill with potting mix, lightly compress around the plant, and water thoroughly.

Regardless of starting from seeds or seedlings, maintain a moist environment for young plants. Shielding them from strong winds and heavy rain in their tender growing phase.

  1. Transplanting Tips for Mature Plants

You should usually transplant them every two to four years. Choose new plastic plant pots slightly larger than the old ones. Gently tease the roots to loosen them before placing the plant in the new pot.

Backfill with fresh potting mix, firm down to remove air pockets, and water thoroughly. Be gentle with the root system. It’s the plant's lifeline to nutrients and water.

  1. Seasonal considerations for planting

For potted passionfruit, it's less about seasons and more about consistent temperature and sunlight. However, generally planting in the late spring or early summer can give young plants the best start. This can ensure warmer weather and longer daylight hours.

Passion Fruit Care in Pots

  1. Watering Schedule and Tips

The key to watering passion fruit in pots is balance. Overwatering can cause root rot, while under-watering leads to wilting and poor fruit sets.

Regularly check the soil moisture, especially during the fruiting season. Keep it consistently damp but not soaked. Consider installing a self-watering system to maintain adequate moisture levels.

  1. Fertilization Guidelines

A slow-release fertilizer high in potassium and phosphorus, the elements responsible for flowering and fruiting, is ideal. Apply this at the beginning of spring and summer.

You can also use organic fertilizers more frequently. But ensure they are balanced to avoid overly vegetative growth at the expense of fruits.

  1. Pruning Techniques

Pruning can maintain the health and shape of the plant. Cutting back the leading shoot once the vine reaches the desired height. This can encourage lateral growth.

Trim side shoots to about two leaves to prevent overcrowding and allow airflow. After each major pruning, the vine may take a short time to recover before producing more fruits. So this time with the end of the harvest season.

  1. Pest and Disease Management

Keeping a close eye on passionfruit vines in pots is the best defense against pests and diseases. Scale insects, mites, and aphids are common culprits. But you can manage them with organic sprays.

Employ natural deterrents like neem oil for pests. Practice good hygiene by clearing away fallen leaves and fruit. If necessary, consider introducing beneficial insects to your environment to control pest populations.

Likewise, you can keep fungal diseases at bay with good maintenance. For example, brown spot and root rot. Consider using fungicides if diseases persist. But always follow recommended guidelines carefully.

Training Your Passionfruit Vine in Pot

  1. Installing a Support Structure for Vertical Growth

Passion fruit needs a sturdy support to climb. Consider a trellis, an arbor, or a series of stakes for vertical guidance. Ensure the structure is stable and tall enough to accommodate the vine’s potential height.

  1. Training Methods for a Compact and Manageable Plant

Start training your passion fruit vine by gently tying the stems to the support. Aim to create a V-shaped canopy. This will help the plant receive light and air for optimal growth. Continue to tie and tuck new growth as it appears. This can maintain a tidy and productive vine.

  1. Benefits of Proper Training on Fruit Production

A well-trained passion fruit vine is a fruitful passion fruit vine. Keeping the plant compact and focused can encourage it to produce more blossoms. You will have more delicious fruit. It is easier to manage pests and diseases. You can more easily inspect and treat the passion fruit plant in pot.

Maximizing Fruit Yield

  1. Understanding the Flowering and Fruiting Cycle

Passion fruit plants typically begin to flower in the second year of growth. The flowers are typically large and white with a purple center. Within a few days of flowering, small green fruits will begin to develop. It takes about 70 to 80 days for these fruits to ripen.

  1. Pollination Techniques for Potted Passion Fruit Plants

Passion fruit plants can self-pollinate. Hand pollination is a reliable method for potted passion fruit plants. Simply use a small, soft brush to collect pollen from one flower. Transfer it to the stigma of another. This will greatly increase the number of fruits that set and develop.

  1. Harvesting Tips and Signs of Ripe Passion Fruit

Passion fruit that's ready to be harvested will fall from the vine with a gentle twist. If it doesn't, you can taste-test one. It should be slightly wrinkly for the best flavor.

Don't pick them while they're still completely smooth. Because you'll end up with a tart fruit that isn't quite ready. Cut the fruit from the vine, leaving a bit of the stem intact.

Conclusion

Growing passion fruit in pots has challenges. But the process is both manageable and rewarding. With the right amount of sunshine, water, and love, your passion fruit plant will reward you with a bountiful harvest.