Category Archives: Planting Tips

How to Propagate Peonies from Seed?

Introduction

Peonies are known for their large and extravagant blooms. People often propagate them by division. But can you grow peonies from seed? We will provide steps on how to grow peony from seed.

Understanding Peony Seeds

  1. What Do Peonies Seeds Look Like?

Peony seeds are shiny, dark purple to black. They have different shapes, from plump, wedge-like to oblong. Peony seeds are usually found within the fruit of the peony. Peony seeds develop after the flowers are pollinated.

Upon harvesting, you’ll notice a coating on the seeds. You need to scarify or break this coating to encourage germination. Peony seeds are not quick to sprout. Some may remain viable for years before they decide to grow.

  1. Three Main Types of Peonies

Herbaceous peonies: The most common type, they die back in winter. Leave stumps above ground. These will regenerate the following spring.

Tree peonies: Woody shrubs that maintain their structure year-round. They often produce large and vibrantly colored blossoms.

Intersectional peonies (or Itoh peonies): A hybrid of the two main types. They offer the best of both in terms of hardiness and bloom strength.

Harvesting Peony Seeds

  1. When to Harvest Peony Seeds?

Seeds are ready for harvest when the peony blooms have faded. The seed pods begin to dry and crack open. This typically occurs in late August to early September.

  1. The Harvesting Process

When seed pods start to split, use scissors to cut the pod from the plant. Take care not to damage the seeds. Collect the pods in a paper bag. Leave them in a warm, dry space to finish drying.

  1. Maturation Is Key

Ensure the seeds are fully matured before harvesting them or attempting to grow them. This means leaving the seed pods on the plant until the seeds inside have turned from white to a brownish-black color. For peonies, patience is definitely a virtue. The seeds may take a few months to mature.

When the time is right, each seed will be smooth, round, and firm. If the seeds are wrinkled, mushy, or damaged, they won’t germinate. So give them a gentle squeeze to test their vigor before storing them in a cool, dry place.

Preparing for Planting

  1. Clean and Dry Peony Seeds

Before planting peonies from seed pods, you should clean and dry the seeds. Rinse them thoroughly to remove any pulp or debris. Then, laying them out to dry in a cool, dark place. Any excess moisture can lead to mold and seed rot, so drying is essential.

  1. Stratification

Refrigeration Method: Place seeds in a moistened medium. For example, peat moss or a paper towel. Seal it in a plastic bag. Keep the bag in the refrigerator for about three months. Check occasionally for moisture levels and potential mold.

Outdoor Method: For the more daring gardener, outdoor stratification involves planting the seeds directly in the garden in the fall. The seeds will experience the cold temperatures required. But be mindful of animals that might disturb the soil.

  1. Scarification for Better Germination

Peony seeds have a hard outer shell that can inhibit germination. Scarifying the seeds (making small nicks on the seed coat) can significantly improve germination rates. This can be done carefully with a sharp blade.  Soak the seeds in warm water for 24 hours.

How to Grow A Peony from Seed?

  1. Soil Preparation

Peonies appreciate well-draining soil. So a mix of one part peat, one part perlite, and one part sterilized soil is an ideal combination. Ensure your soil is slightly acidic, with a pH level between 6.5 and 7.0. Use plastic garden pots with drainage holes to prevent waterlogging. Because peony seeds are particularly averse to.

  1. Peony Planting Time

The best time to plant peony seeds is in late autumn or early winter. Take advantage of the natural cooling and expansion that this season brings.  These changes are necessary for breaking the seed dormancy.

  1. How Deep to Plant Peony Seeds?

Planting tree peony seeds no deeper than twice their diameter. A half inch to one inch in a planting medium is sufficient. Peonies seedlings don’t appreciate competition. So space your seeds about 6 inches apart.

  1. How to Germinate Peony Seeds?

After sowing peony seeds, water them lightly to settle them in. Cover the two gallon pot with a plastic bag. Maintain moisture and provide a stable environment for germination. Keep the containers at a temperature of around 40 to 50 degrees Fahrenheit. This simulates the cold stratification peony seeds require.

2 gallon nursery pots

Caring for Peony Seedlings

  1. Optimal Growing Conditions

Peonies prefer full sun but can tolerate partial shade. They’re not too picky about soil pH, as long as it’s well-draining. Check the moisture regularly. Keep the soil consistently moist but not waterlogged.

  1. Watering Seedlings

Peony seedlings are particularly sensitive to overwatering and damping off. It is a fungal disease that causes young seedlings to collapse and die. To prevent this, water from the bottom of the pot. Place it in a saucer of water. Allow the soil to soak up moisture.

  1. Fertilizing Seedlings

When the seedlings have grown a bit and appear stronger, you can begin fertilizing. You can use a balanced fertilizer or compost tea. This encourages healthy root development and overall growth.

Transplanting Seedlings

  1. When to Transplant Seedlings in Pots?

Seedlings will typically be ready for transplanting about six to eight weeks after germination. Look for roots starting to come out of the drainage holes at the bottom of the 3 gallon plastic pots. A larger pot with ample room is necessary.

  1. Instructions for Transplanting Seedlings

Carefully slide the seedling out of its current pot, soil and all. If the roots are heavily compacted in the shape of the pot, gently tease them apart to encourage outward growth. Plant the seedling in its new container or garden bed at the same level it was before. Water the plant well to settle the soil around the roots.

  1. Tips for Minimizing Transplant Shock

Keep the soil around the seedlings moist in the days leading up to the transplant. Try to transplant on a cloudy day or in the evening. This can minimize the shock from direct sunlight.

After transplanting, place the plants in a location with diffused light. You should also protect them from the wind. Water the transplants regularly to keep the soil moist but not waterlogged.

Continued Care and Maintenance

  1. Care for Young Peony Plants

The roots of peonies are sensitive to waterlogging. Water deeply but infrequently. Allow the soil to dry out between watering to avoid root rot.

Peonies are not heavy feeders. But an annual application of a balanced fertilizer in early spring can boost their growth and flowering potential.

Keep an eye out for pests and address any issues promptly. Organic pest control methods are often the safest for your plants and the environment.

  1. Supporting Peony Growth

Large peony blooms can be heavy. Sometimes this may cause the plant to lean or break. Providing support can prevent this and maintain the plant’s aesthetics. For example, stakes.

  1. Winter Protection

In cold climates, a layer of mulch around the base of your peony plant can protect it from the harshness of winter. This is especially important for young plants. They also retain soil moisture and deters weeds.

  1. How Long Does It Take to Grow Peonies from Seed?

Growing peonies from seed may take about 3-5 years. Most peony seeds will sprout in the spring of the first season. But some may take a second year.

Conclusion

Now you know how to plant peonies from seed. The process may take longer than other propagation methods. But the reward is an unparalleled experience for you.

The Ultimate Guide to Growing Foxglove from Seed

Introduction

We will discuss the essential steps to successfully grow digitalis from seed. You will have a clear pathway to cultivating a flourishing foxglove garden patch.

Selecting Seeds

  1. Choosing Reputable Seed Suppliers

When sowing foxgloves, the first hurdle is finding quality seeds. You should look for suppliers with a known track record for providing healthy and viable seeds. Look for reviews and feedback from other gardeners to ensure you're making a sound investment.

  1. Foxglove Seed Varieties

Foxglove growing zones are in USDA hardiness zones 4–9. Consider the different varieties of digitalis, the genus for foxglove. There's a range of foxglove species and cultivars. Each with unique colors, sizes, and growing habits.

For example, Digitalis purpurea has the classic purple and white flowers. However, Digitalis grandiflora boasts creamy-yellow blooms. It prefers a more humid climate.

  1. Selecting the Best Seeds for Your Garden

Avoid seeds that are discolored, misshapen, or damaged. Instead, choose seeds with plump, uniformly sized, and have a consistent color. Healthy seeds are more likely to germinate and grow into robust plants.

Also, if you have the chance, select organically-grown seeds. They often result in healthier plants with higher resistance to pests and diseases.

Preparing for Planting

  1. When to Plant Digitalis Seeds?

The best time to plant foxglove seeds is from late spring to early summer. Sowing foxglove seeds when the weather is cool. This gives the plants a chance to establish before winter. They thrive when a natural cycle of frost can break their dormancy. This leads to stronger plants come springtime.

  1. Preparing the Soil

Your foxgloves-to-be will appreciate light, well-drained soil. Amend your garden bed with organic matter and a bit of sand if the soil is heavy or prone to puddling. Foxgloves prefer moisture but detest sitting in soggy soil. Test the pH of your planting site. They prefer slightly acidic soil with a pH level 5.5-6.5.

  1. Tools and Materials

Gardening gloves, a trusty trowel, and good watering are your best friends when propagating foxgloves from seed. Foxglove seeds are small. So having a dibber or something with a small tip. This can make seed planting more precise.

How to Grow Foxglove from Seed?

  1. Direct Sowing vs. Starting Indoors

When you're ready to plant, you have two main options: direct sowing into the garden or starting seeds indoors. Direct sowing simplifies the process. While growing foxglove from seed indoors with controlled conditions can lead to stronger plants.

Direct sowing is as simple as broadcasting seeds on prepared soil and lightly covering them. Indoors, sow the fine seeds on moistened, sterile seed starting mix. Cover the plastic seed tray to retain moisture until germination.

XQ 15 cells seedling trays

  1. How to Plant Foxglove Seeds?

Whether indoors or out, ensure the soil is well-drained. Keep it consistently moist but not waterlogged. Germination can take from a few weeks to over a month. Once foxgloves seedlings are a few inches tall, thin to the strongest plants.

  1. Tips for Foxglove Germination

For the greatest success, use bottom heat mats if germinating indoors. Ensure a good source of bright, indirect light. Consider using a fungicide to prevent 'damping off'. This disease can attack your seedlings.

When the seedlings have their first set of true leaves, transplant them to large plastic nursery pots. After the last frost of spring, acclimate the plants to outdoor conditions. Then plant them out.

Caring for Foxglove Seedlings

  1. Watering Techniques

Continue with the misting method for young seedlings. They have tender roots, and strong streams of water can uproot them. Water in the mornings. The foliage will have time to dry off during the day. This reduces the risk of fungal diseases.

  1. Fertilizing Strategy

After the first true leaves appear, apply a diluted, balanced liquid fertilizer. Follow the manufacturer's instructions for the correct dosage. Avoid getting the fertilizer on the leaves to prevent them from burning.

  1. Pest and Disease Management

Keep a watchful eye for pests and diseases. For example, slugs and powdery mildew. If identified, treat the issue promptly with appropriate solutions. These may include organic insecticidal soaps or neem oil for pests and a fungicide for diseases.

Transplanting Seedlings

  1. Determining Seedling Readiness

Timing is critical when transplanting foxglove seedlings. Foxglove germination time is 14-21 days at 65-70°F (18-21°C). Typically, after foxglove seed germination, you should thin out seedlings when they have their first true set of leaves.

This usually occurs around 10-12 weeks after sowing. The seedlings should have at least four to five mature leaves before transplanting them into the garden. You may need to transplant earlier if seedlings are larger or growing faster.

  1. Soil Preparation and Spacing

Do foxgloves need full sun? Foxgloves prefer moist, well-drained soil and partial shade. Prepare the transplant site by enriching the soil with organic matter. For example, compost or well-rotted manure. Ensure the pH level of the soil is slightly acidic for the best growth.

How tall do foxglove grow? Spacing should accommodate the plant's future size. Mature foxglove plants can reach 2-5 feet in height, with a spread of 1-2 feet. Space the plants 1.5-2 feet apart. This prevents overcrowding, which can lead to disease.

  1. Transplanting Techniques

Gently remove the seedlings from 1.5 gallon nursery pots. Trying to disturb the root system as little as possible. If roots are circling the pots, lightly tease them out before planting.

Dig a hole in the prepared soil slightly larger than the root system of the seedling. Place the plant in the hole. Ensure the crown (where the leaves meet the roots) is at soil level. Pat the soil gently around the seedling. Water thoroughly to help settle the soil.

Transplant in the late evening or a cloudy day to minimize transplant shock. Morning is also a good time. The plants have the entire day to recover before temperatures cool in the evening.

Transplanting seedlings earlier in the day may be stressful. The sun can exacerbate water loss and dehydration. Use a trowel for best results. Try not to transplant during windy days or in muddy soil conditions.

Foxglove Maintenance

  1. Watering and Fertilizing Established Plants

Established foxglove plants should be watered during dry periods to keep the soil moist but not saturated. An annual feeding in early spring with a balanced fertilizer will help them maintain their strength.

  1. Mulching to Conserve Moisture

Mulching can help conserve soil moisture and reduces the competition from weeds. It also keeps the plants' roots cool in the summer.

  1. Providing Support for Tall Varieties

Tall foxglove varieties can benefit from staking to support their height, particularly in windy locations. Make sure the stakes are placed when the plants are young. This can avoid root damage later.

Harvesting Foxglove Seeds

  1. When Seed Pods Are Ready for Harvesting?

A mature seed pod will feel dry and should be just starting to crack open. Squeeze gently to ensure they're ready for harvest. If the pod bursts open easily, it's time to collect the seeds.

  1. Harvesting Techniques

To harvest, gently pinch the seed pod at its base and pull it off the stem. Use a paper bag or tray to catch seeds as you work to avoid losing any.

  1. Storing and Saving Foxglove Seeds

After harvest, ensure the seeds are completely dry before storing. Lay them out on a paper towel in a well-ventilated area for a few days. Once dry, store the seeds in a cool and dark place. For example, a paper envelope. Properly stored, foxglove seeds can remain viable for several years.

Conclusion

Propagating foxgloves from seed allows you to control and observe the entire life cycle of digitalis plants. With this guide, your garden will soon be home to these regal, natural works of art.

Azalea Leaves Turning Yellow: Causes and Remedies

Introduction

Different factors can cause azalea yellow leaves. Here are some common reasons why your azalea leaves might be turning yellow. Proper identification of the underlying cause can save your plant.

Why Are My Azalea Leaves Turning Yellow?

Environmental Factors

Sunlight Exposure and Sunburn: If your azalea in fabric grow bags is suddenly exposed to high-intensity light, the leaf tissue may become scorched. This can result in azalea leaves turning yellow with brown spots.

Watering Issues: Overwatering can lead to root rot, which in turn causes a reduction in the plant's ability to take up water and nutrients. This can lead to yellow leaves on azaleas. Underwatering, on the other hand, can deprive the plant of essential moisture and nutrients.

Soil pH Imbalance: Azaleas thrive in acidic soil with a pH range of 4.5 to 6.0. Any discrepancy in this range and the soil’s alkalinity can lock up essential nutrients. For example, iron. This prevents the azalea from taking them up. This often manifests in yellowing between the veins of the leaves, while the veins themselves remain green.

Pests and Diseases

Azalea Lace Bugs: These tiny pests can cause stippling on the leaves. This appears as tiny, white or yellow spots. These can lead to the yellowing of the foliage over time.

Fungal Diseases: Various fungi can attack azaleas. They cause symptoms like leaf wilting, leaf spot, and yellowing. Root rot is another common fungal issue. Overwatering or poorly drained soils caused it.  This can lead to yellow azalea leaves and overall wilting of the plant.

Nutritional Deficiencies

Lack of essential nutrients: A healthy azalea requires a balance of nutrients to maintain its vibrant green color. Key nutrients like nitrogen, iron, and magnesium are particularly crucial. A lack of any one of these can manifest in azalea yellow leaf. Sometimes accompanied by visible changes in the veins or a more general paleness in the leaf color.

Poor soil quality: The soil pH also comes into play. Azaleas thrive in acidic soils, and when it rises, critical nutrients may become less available for the plant to uptake. Poor soil quality can exacerbate these issues. It can hinder the plant's ability to draw up essential nutrients from the plastic flower pots soil.

Diagnostic Steps

Visual Inspection

Uniform Yellowing: This often points to a broad environmental or systemic nutrient issue. Azaleas with yellow leaves are possibly soil health, or watering habits.

Patch Discoloration: Fungal or bacterial infections might be at play. Particularly if the spots are ringed with irregular margins.

Wilting or Weakness: Common pests can lead to azalea leaves turning yellow and falling off. For example, lace bugs or scales. They leave telltale signs if you look closely, often on the undersides of the foliage.

Soil Testing

pH and Nutrient Levels: Azaleas are particular about their soil environment. An alkaline soil pH can inhibit nutrient uptake. This leads to iron or nitrogen deficiencies. A lack of them can lead to yellow leaves on azaleas.

Home Tests: At-home soil test kits are an accessible tool for gardeners to monitor pH and nutrient levels. While not as precise as professional analysis, they can highlight major imbalances.

Professional Assessment: For serious cases or if multiple plants are affected, a laboratory soil test can provide actionable insights. They can offer detailed recommendations for amendments and care.

Treatment and Prevention

Environmental Management

Adjusting sunlight exposure: Azaleas prefer dappled shade or locations with morning sun and afternoon shade. Direct sunlight during the hottest part of the day can cause stress and lead to azalea yellow leaves. Adding shade cloth or other materials to create a shade structure during the peak sun hours.

Prune back nearby trees or bushes that may be shading them too much. Similarly, remove branches or leaves that could be casting too much shade on your azalea.

Proper watering techniques: Water in the morning to ensure foliage dries off before cooler evening temperatures. Use a soaker hose or watering can to deliver water directly to the soil. Check the soil moisture by inserting a finger or a moisture meter into the soil. This avoids over or under-watering.

Soil Amendments: Apply sulfur or other acidifying agents to lower the soil pH gradually over time. Mix in organic matter like peat moss to improve drainage and maintain acidity. Regularly test the pH of your soil and adjust as necessary. This can provide the best growing conditions for azaleas.

Pest and Disease Control

Organic and chemical options: Organic controls can be effective against many common azalea pests, without harming beneficial insects. For example, neem oil or insecticidal soaps.

For a more severe infestation, chemical insecticides can provide targeted intervention. Be sure to apply according to the manufacturer's guidelines and with the appropriate safety measures.

Preventing Fungal Diseases: These often take hold in humid environments with poor air circulation. To prevent these issues, ensure proper spacing between plants. Proper pruning techniques can also encourage air flow.

Water azaleas in a 20 gallon pot at the base to keep foliage dry. This reduces the risk of fungal spores taking hold. You can use fungicides to preventatively during wet seasons or when humidity is high.

20 gallon garden pot

Nutritional Supplements

Fertilization schedules: Typically, azaleas benefit from a feed in early spring, after flowering, and again in late spring or early summer. This ensures they have enough nutrients for both flowering and leaf growth.

Recommendations: Choose a fertilizer formulated for azaleas, camellias, and rhododendrons.  Make sure it is rich in nitrogen for green leaves, phosphorus for blooms, and potash.

Balanced fertilizers: Azaleas need a mix of macronutrients (nitrogen, phosphorus, potassium) and micronutrients (iron, magnesium, zinc, etc.). A soil test can verify if additional micronutrients are needed.

Maintenance Practices

Regular inspection: Monitor your azaleas weekly for pests, diseases, and nutrient deficiencies. Early detection can prevent significant issues.

Maintenance routines: Prune dead or yellowing branches and spent blooms regularly to promote new growth. Thoroughly clean up fallen leaves from around the plant. This prevents the spread of disease.

Mulching and weed control: Apply a layer of organic mulch around the base of your azalea. For example, pine needles or wood chips. This can retain moisture in the soil, regulate soil temperature, and prevent weeds that compete for nutrients.

Conclusion

By addressing these common issues, you can successfully combat azalea leaves turning yellow. This ensures a beautiful and healthy garden.

A Complete Guide to Growing Passion Fruit in Pots

Introduction

Growing passion fruit in pots is an exercise in both patience and ingenuity. Here’s how to grow passion fruit in pots, and harvest your vine-to-table experience in no time.

Selecting the Right Pot and Soil

  1. Container Size

The first step to growing passion fruit in pots is to select the right container. You can choose 5 gallon plastic pots or 7 gallon plastic pots. Passion fruit plants thrive in large containers. They can provide ample space for their root system to expand.

5 gallon plastic pots

  1. Ideal Potting Mix

The quality of the potting mix is paramount for the health and productivity of your passion fruit. A well-draining soil mix that's rich in organic matter is excellent. For example, compost or peat moss. The pH level should hover between 5.5 and 6.5, slightly on the acidic side.

  1. Importance of Drainage

Passion fruit vines abhor wet feet. Always choose pots with drainage holes. Consider adding a layer of gravel at the bottom of the pot to enhance drainage further. Before growing passionfruit in a pot, ensure the mix is moist but not waterlogged. This allows the excess moisture to escape easily.

Choosing the Perfect Passion Fruit Variety

  1. Passion Fruit Varieties Suitable for Container Gardening

Not all passion fruit varieties are well-suited for life in a pot. You should choose the right one when growing passion fruit in containers. For container gardening, look for dwarf or bush varieties that don't have extensive root systems.

The Frederick and Possum Purple cultivars are excellent choices. They have compact growth and bountiful fruiting even in restricted spaces.

  1. Climate and Local Conditions

Climate plays a significant role in the viability of passion fruit plant in pot. If you experience harsh winters, you may need to bring the plant indoors or protect it from frost. Conversely, too much heat can cause problems.

Passionfruit vine in pot can be sensitive to environmental changes, especially in its early stages. So consistent conditions are important to help your vine grow strong and healthy.

How to Grow Passion Fruit in Pots?

  1. Planting from Seeds

Begin with a good quality seed. This sets the foundation of your passion fruit plant's health and productivity. Fill your 7 gallon pots three-quarters full with the potting mix.

Plant the seed about 1 inch deep in the center. Cover with potting mix and lightly tamp it down. Water gently, keeping the soil moist but not waterlogged. Place the pot in a warm, sunny location. Wait for germination in two to four weeks.

  1. Planting Seedlings

Choose a 6 to 10-week-old seedling or cutting from a reputable source. Dig a hole in the center of your potting mix. Make sure it is deep enough to cover the root ball without burying the stem.

Gently place the seedling in the hole. Ensure the soil level around the stem is the same level as it was in the pots. Backfill with potting mix, lightly compress around the plant, and water thoroughly.

Regardless of starting from seeds or seedlings, maintain a moist environment for young plants. Shielding them from strong winds and heavy rain in their tender growing phase.

  1. Transplanting Tips for Mature Plants

You should usually transplant them every two to four years. Choose new plastic plant pots slightly larger than the old ones. Gently tease the roots to loosen them before placing the plant in the new pot.

Backfill with fresh potting mix, firm down to remove air pockets, and water thoroughly. Be gentle with the root system. It’s the plant's lifeline to nutrients and water.

  1. Seasonal considerations for planting

For potted passionfruit, it's less about seasons and more about consistent temperature and sunlight. However, generally planting in the late spring or early summer can give young plants the best start. This can ensure warmer weather and longer daylight hours.

Passion Fruit Care in Pots

  1. Watering Schedule and Tips

The key to watering passion fruit in pots is balance. Overwatering can cause root rot, while under-watering leads to wilting and poor fruit sets.

Regularly check the soil moisture, especially during the fruiting season. Keep it consistently damp but not soaked. Consider installing a self-watering system to maintain adequate moisture levels.

  1. Fertilization Guidelines

A slow-release fertilizer high in potassium and phosphorus, the elements responsible for flowering and fruiting, is ideal. Apply this at the beginning of spring and summer.

You can also use organic fertilizers more frequently. But ensure they are balanced to avoid overly vegetative growth at the expense of fruits.

  1. Pruning Techniques

Pruning can maintain the health and shape of the plant. Cutting back the leading shoot once the vine reaches the desired height. This can encourage lateral growth.

Trim side shoots to about two leaves to prevent overcrowding and allow airflow. After each major pruning, the vine may take a short time to recover before producing more fruits. So this time with the end of the harvest season.

  1. Pest and Disease Management

Keeping a close eye on passionfruit vines in pots is the best defense against pests and diseases. Scale insects, mites, and aphids are common culprits. But you can manage them with organic sprays.

Employ natural deterrents like neem oil for pests. Practice good hygiene by clearing away fallen leaves and fruit. If necessary, consider introducing beneficial insects to your environment to control pest populations.

Likewise, you can keep fungal diseases at bay with good maintenance. For example, brown spot and root rot. Consider using fungicides if diseases persist. But always follow recommended guidelines carefully.

Training Your Passionfruit Vine in Pot

  1. Installing a Support Structure for Vertical Growth

Passion fruit needs a sturdy support to climb. Consider a trellis, an arbor, or a series of stakes for vertical guidance. Ensure the structure is stable and tall enough to accommodate the vine’s potential height.

  1. Training Methods for a Compact and Manageable Plant

Start training your passion fruit vine by gently tying the stems to the support. Aim to create a V-shaped canopy. This will help the plant receive light and air for optimal growth. Continue to tie and tuck new growth as it appears. This can maintain a tidy and productive vine.

  1. Benefits of Proper Training on Fruit Production

A well-trained passion fruit vine is a fruitful passion fruit vine. Keeping the plant compact and focused can encourage it to produce more blossoms. You will have more delicious fruit. It is easier to manage pests and diseases. You can more easily inspect and treat the passion fruit plant in pot.

Maximizing Fruit Yield

  1. Understanding the Flowering and Fruiting Cycle

Passion fruit plants typically begin to flower in the second year of growth. The flowers are typically large and white with a purple center. Within a few days of flowering, small green fruits will begin to develop. It takes about 70 to 80 days for these fruits to ripen.

  1. Pollination Techniques for Potted Passion Fruit Plants

Passion fruit plants can self-pollinate. Hand pollination is a reliable method for potted passion fruit plants. Simply use a small, soft brush to collect pollen from one flower. Transfer it to the stigma of another. This will greatly increase the number of fruits that set and develop.

  1. Harvesting Tips and Signs of Ripe Passion Fruit

Passion fruit that's ready to be harvested will fall from the vine with a gentle twist. If it doesn't, you can taste-test one. It should be slightly wrinkly for the best flavor.

Don't pick them while they're still completely smooth. Because you'll end up with a tart fruit that isn't quite ready. Cut the fruit from the vine, leaving a bit of the stem intact.

Conclusion

Growing passion fruit in pots has challenges. But the process is both manageable and rewarding. With the right amount of sunshine, water, and love, your passion fruit plant will reward you with a bountiful harvest.

A Complete Guide to Growing Jalapenos in Pots

I. Introduction

You can use Jalapeno peppers in many cuisines. They add flavor and heat to dishes. This makes them a favorite among food enthusiasts. You can easily purchase jalapenos from grocery stores. But growing them at home is cost-effective. You will have a continuous supply of fresh peppers. We will discuss everything you need to know about growing jalapenos in pots.

II. Why Grow Jalapenos in Pots?

1. Flexibility and Mobility

Growing jalapenos in pots allows for more control over the growing conditions. You can easily move jalapeno plants in pots to different locations. You can bring potted jalapenos inside during cold months. This extends the growing season and allows for a longer harvest. You can enjoy fresh jalapenos even when they are typically out of season.

In addition, you can easily switch out the potting soil for jalapenos. Or add in different nutrients to see what works best for your jalapeno plants. This level of flexibility is not as easily achievable with traditional in-ground gardening.

2. Space-Saving Aspect

Another advantage of growing jalapenos in containers is the space-saving aspect. Container gardening allows you to grow plants in a smaller area. It is perfect for those with limited outdoor space. You can easily place plastic pots on a balcony, patio or windowsill. It is an ideal option for urban dwellers. Because they may not have access to a traditional garden.

Container gardening also allows for vertical growing. Many varieties of jalapenos can grow upwards. They are suitable for hanging baskets and trellises. You can grow more plants in a small area.

III. Best Size Pot for Jalapeno Plant

When growing jalapeno peppers in containers, choose the right container for the success of your plants. The right jalapeno plant pot size and material can provide a healthy environment for your jalapeno plants.

1. Ideal Jalapeno Pot Size and Material

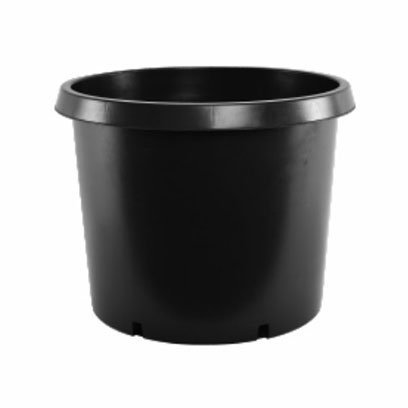
Make sure the jalapeno pepper pot size is at least 12 inches in diameter. The roots will have enough space to grow. Avoid using small pots. Because they can restrict root growth, leading to stunted plants. Additionally, a pot that is too small may dry out quickly. This results in stressed and unhealthy plants.

Terracotta pots are a popular choice. They are durable and have good drainage. However, they are also heavy and prone to cracking in extreme temperatures. Plastic pots are lightweight and have different sizes and shapes. They also retain moisture well.

2. Importance of Drainage

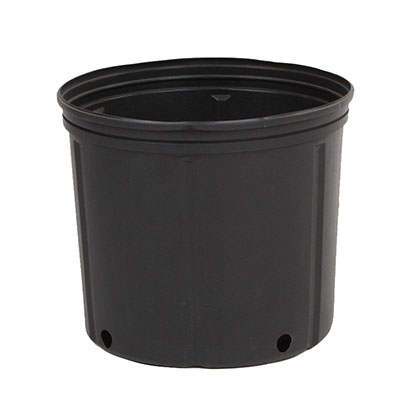
Jalapeno peppers growing in pots prefer well-drained soil. Excess water can accumulate at the bottom without proper drainage. This leads to root rot and other diseases. To ensure good drainage, choose 7 gallon nursery pots with drainage holes at the bottom. These holes will allow excess water to drain out of the pot, preventing waterlogged soil.

3. Tips for Choosing Pots with Good Drainage

When shopping for pots, it's important to check the drainage holes at the bottom. Avoid using containers without any drainage holes. Because they can cause water to accumulate and suffocate the plant's roots. Additionally, make sure there are enough drainage holes.

You can also place a layer of gravel or broken pottery pieces at the bottom of the pot before adding soil. The excess water can drain out. It also prevents the soil from clogging up the drainage holes.

4. Using Self-Watering Containers

Self-watering containers are an excellent option for growing jalapenos. Especially for those who may forget to water their plants regularly. These containers have a reservoir at the bottom. It holds water and releases it slowly into the soil as needed. This can maintain consistent moisture levels and prevent overwatering.

When using a self-watering container, make sure to fill the reservoir regularly. Especially during hot weather when plants may need more water. Monitor the moisture levels in the soil. Ensure it doesn't dry out completely.

IV. Selecting the Right Jalapeno Varieties

1. Popular Jalapeno Pepper Varieties

Early Jalapeno: This variety produces peppers earlier in the season compared to others. This is great if you live in a cool climate with short growing seasons.

Craig's Grande: This variety is known for its larger size. It is a great choice if you want to stuff your peppers or use them for salsa. It also has a milder heat level compared to other varieties.

Jalapeno M: This variety is perfect for container gardening. It has a compact growth habit and produces an abundance of peppers. Jalapeno M also has a medium heat level. So it is suitable for those who prefer less spicy peppers.

Jalapeno Tam: This variety is similar to the Early Jalapeno. But with larger and thicker fruits. It also has a slightly milder heat level. So Jalapeno Tam is perfect for those who enjoy the flavor of jalapenos without too much spice.

Purple Jalapeno: This unique variety produces purple peppers that turn red when ripe. It also has a medium heat level and is perfect for adding color to your container garden.

2. Factors to Consider When Choosing a Variety

Size: The main consideration is its size. Some varieties, like Craig's Grande, produce larger peppers. They are perfect for stuffing or using in dishes like salsa. You should choose a small variety if you have limited space.

Heat Level: Jalapenos are known for their heat level. But some varieties have a milder heat level than others. If you prefer less spicy peppers, look for varieties like Jalepeno M or Purple Jalapeno.

Growth Habit: As mentioned earlier, some jalapeno varieties have a more compact growth habit. This makes them ideal for container gardening. Other varieties can grow quite tall. For example, Craig's Grande. They may require staking or support to thrive in a container.

Days to Maturity: You should consider the amount of time it takes for a particular variety to mature and produce peppers. Some varieties, like Early Jalapeno, have a shorter maturity period. This makes them perfect for those who want to harvest their peppers sooner rather than later.

Resistance: Lastly, consider any resistance or tolerance that a jalapeno variety may have. This is especially important if your area has certain pests or diseases. Look for varieties that have resistance to common issues like tobacco mosaic virus or bacterial leaf spot.

V. How to Grow Jalapenos in Pots?

1. Soil for Jalapeno Peppers

You can combine some materials to create the best potting soil for jalapenos. For example, soil, compost, and perlite or vermiculite. Filling a large container with equal parts of potting soil and well-aged compost. The compost provides essential nutrients for your plants. While the potting soil acts as a base to hold moisture.

Add a generous amount of expanded perlite or vermiculite to the mix. These materials help with drainage and aeration. This ensures the roots of your jalapeno plants can breathe and grow properly.

Using a trowel or your hands, mix all the components together thoroughly until you have an evenly blended potting mix. You can also add in some organic slow-release fertilizer. This gives your plants an extra nutrient boost.

2. How to Grow Jalapeno Peppers in a Pot?

Just fill the containers with jalapeno soil. Leave an inch of space at the top. Planting jalapeno seeds in pots about a quarter-inch deep into the soil. Cover lightly with more potting mix. Water lightly. How many jalapeno plants per pot? Generally, one adult jalapeno plant requires a pot.

If using seedlings, gently remove them from their nursery pots. Place seedlings in the center of your jalapeno plant pot. Fill in the gaps with more potting mix. Gently press down around the seedling to secure it. Water your newly planted jalapenos thoroughly.

Place the containers in a location with 6 hours of sunlight per day. Consider using artificial grow lights to supplement the sunlight if you are growing jalapenos indoors.

As your jalapenos grow, keep the soil consistently moist, but not waterlogged. You can check if the plant needs watering by sticking your finger into the soil up to your first knuckle. If it feels dry, it's time to water.

Fertilize your plants every few weeks with a balanced fertilizer. Following the instructions on the packaging. This will provide essential nutrients for healthy growth.

When jalapeno pepper plants in pots grow taller, you may need to stake them for support to prevent them from drooping or breaking. Use bamboo stakes or tomato cages for this purpose.

VI. Sunlight and Temperature Requirements

1. Sunlight Needs of Jalapeno Plants

Ideally, jalapenos need at least six hours of direct sunlight every day. However, they can tolerate partial shade as well. So you can grow jalapenos in a pot on a balcony or patio. Jalapeno plants grown in shad areas may produce small peppers. Therefore, place your jalapeno pot in full sunlight for the majority of the day.

2. Protect Jalapeno Plants from Extreme Temperatures

Jalapeno plants prefer temperatures between 65°F to 85°F. You should monitor the temperature when growing jalapenos in pots. Ensures it stays within the optimal range. Extreme temperatures outside of this range can cause stress on the plants. This results in reduced growth and yield.

You can provide shade during the hottest part of the day in hot weather. For example, move jalapeno peppers growing in pots to a shadier spot or using a shade cloth. Ensure potted jalapeno plants have adequate water. This prevents them from drying out in the heat.

Protect your plants from frost in cold weather. Jalapeno plants in pots are more susceptible to freezing temperatures. Because the roots are not insulated by the ground like in-ground plants. To protect your jalapenos from frost, you can bring them indoors overnight or cover them with a blanket or tarp.

3. Moving Pots to Follow the Sun

As mentioned earlier, jalapeno plants require full sunlight for optimal growth and produce. So it is essential to move jalapeno pepper pot to follow the sun throughout the day. You can observe the sun hitting your outdoor space and move the pots accordingly.

VII. How to Care for Jalapeno Plants in Pots?

1. Watering Requirements for Potted Jalapenos

Jalapeno plant care in pot: Jalapeno peppers require consistent moisture, but not too much. You should water your plants regularly. But be careful not to overwater them. You can stick your finger about an inch into the soil to test the moisture level. , You need to water jalapenos in containers if it feels dry.

2. How to Avoid Overwatering or Underwatering?

Overwatering can lead to root rot and other fungal diseases. They can ultimately kill your jalapeno plants. To avoid overwatering, make sure the pots have proper drainage holes and use a well-draining potting mix. Additionally, water at the base of the plant rather than overhead to prevent excess moisture on the leaves.

Underwatering can cause stunted growth and wilting of your plants. To avoid underwatering, check the moisture level of the soil regularly and water when needed. You can also add mulch on top of the soil. This helps retain moisture.

3. Fertilization

Fertilization is essential for jalapeno in container. Because they are heavy feeders. You can use a balanced fertilizer once every two weeks. Don't over-fertilize jalapenos in pots. Because this can lead to excessive leaf growth and reduced fruit production.

You can also use organic matter to feed your jalapeno plants. This includes compost, aged manure, or worm castings. These organic materials can provide nutrients to your plants. They also improve soil structure and help retain moisture.

When using organic matter, mix it into the potting mix before planting. You can also add compost as a mulch. They will continually feed your plants throughout the growing season.

VIII. Pruning and Support for Growing Jalapenos in Pots

1. Importance of Pruning

Pruning is the process of removing certain parts of a plant to promote healthy growth. For example, branches or leaves. It is especially important for jalapeno plants. Because they have a tendency to become bushy and overcrowded.

By pruning your plants, you can prevent them from competing for nutrients and sunlight. It also promotes air circulation and prevents diseases. Some key benefits of pruning jalapeno plant in a pot include:

Increased yield: By removing excess leaves and branches, the plant can focus its energy on producing more peppers.

Better quality peppers: Pruning helps to direct nutrients towards the production of larger, more flavorful peppers.

Disease prevention: Crowded plants are more susceptible to diseases. But pruning can improve air circulation and reduce the risk of diseases.

2. Best Practices for Supporting Plants

Supporting your jalapeno plants is also crucial for their growth and yield. As they grow tall and produce peppers, the weight of the plant can cause it to droop or even break. By providing proper support, you can prevent this from happening.

Use stakes or cages: They are the most common methods of supporting plants in pots. Make sure to place them in the soil when transplanting your seedlings. Or as soon as they start growing. This will prevent root damage later on.

Tie up branches: As your plants grow, you may notice some branches becoming heavy with peppers. Use twist ties or string to gently tie these branches to the stakes or cages for support.

Regularly check and adjust: Regularly check your supports and make any necessary adjustments as your plants grow. They will continue to provide proper support and prevent any damage to the plants.

Research different methods: There are many ways to support plants. So do some research and find a suitable method. Some gardeners prefer using tomato cages or trellises. While others use DIY supports made of bamboo or other materials.

IX. Common Pests and Diseases in Growing Jalapenos in Pots

1. Common Pests

Aphids: These small insects suck the sap from the plant. They can cause stunted growth and yellowing of leaves.

Thrips: Thrips feed on the leaves and fruits of the plant. They leave behind silver streaks or scars.

Spider Mites: These tiny mites can cause severe damage to the plant. For example, suck jalapenos juices and leave behind webbing.

Flea Beetles: These beetles feed on the foliage of the plant. This creates small holes that can eventually kill it.

Caterpillars: The larvae of various moths and butterflies can eat away at the leaves and fruits of jalapeno plants.

2. Common Diseases

Bacterial Leaf Spot: This disease causes dark spots on the leaves, which eventually turn yellow and fall off.

Powdery Mildew: This fungal infection appears as a white powdery coating on the leaves, stunting their growth.

Root Rot: Overwatering or excessively wet soil can lead to root rot. This causes the plant's roots to rot and eventually kills it.

Verticillium Wilt: This fungal infection causes wilting and yellowing of leaves. They eventually lead to the death of the plant.

Phytophthora Blight: This disease causes dark spots on the fruits, which can eventually rot and fall off.

3. Prevention and Treatment Options

Preventing and treating these pests and diseases is crucial for the health of jalapeno plants. Here are some effective methods:

Hand-Picking: For small infestations, manually removing the pests by hand.

Natural Predators: Attracting natural predators to your garden. For example, ladybugs and lacewings. This can help control pest populations.

Insecticidal Soap: Spraying the plant with insecticidal soap. This can help eliminate pests without harming the plant.

Neem Oil: You can spray neem oil on plants to control pests. Its anti-fungal properties can help prevent diseases.

Crop Rotation: Rotating the location of your jalapeno plants each year. This can prevent soil-borne diseases.

Proper Watering: Avoid overwatering and ensure proper drainage. This prevents root rot and fungal infections.

Sanitation: Regularly cleaning and removing any dead or diseased plants. This can prevent the spread of diseases.

Companion Planting: Planting certain herbs and flowers alongside jalapenos. For example, marigolds and basil. This can repel pests and attract beneficial insects.

It is best to move the pots in the morning. Because the temperatures are cooler and plants are less likely to get stressed from being moved. You can also invest in a rolling plant caddy or use a dolly to make the moving process easier. Just be sure not to move the plants too often. Because this can also cause stress on them.

If you are growing jalapenos in pots indoors, place it near a south-facing window with the most sunlight. You may need to rotate the pots every few days. Ensure all sides of the plant receive adequate sunlight.

X. Harvesting and Storing Jalapenos

1. Determining When Jalapenos are Ready for Harvest

You should know when they are ripe and ready for picking. Jalapenos usually mature in 70 to 85 days after planting. Look out for visual cues rather than relying solely on the number of days. Another way is by gently squeezing them. Ripe jalapenos will be firm but slightly soft to the touch. If they feel hard, wait a few more days before checking again.

You can also look at their size and color. Fully ripe jalapenos are usually 2-3 inches long. They should also have a shiny green color that gradually turns red as they mature. If you prefer spicier peppers, you can leave them on the plant until they turn completely red.

Not all peppers on the plant will ripen at the same time. You may have some ready for harvest while others are still growing and changing color. In this case, you can pick the ripe ones and leave the rest to continue maturing.

2. Tips on Harvesting Without Damaging the Plant

Use sharp gardening shears or scissors to cut the peppers from the plant. Avoid pulling or twisting them, as this can damage the plant and affect future growth. Hold onto the stem of the pepper with one hand. Cutting it off with the other. This will prevent any accidental damage to the plant.

Harvest jalapenos in the morning when they are cool and crisp. Avoid picking them on hot afternoons as they may wilt and become more prone to damage. Be careful not to break any branches or leaves while harvesting.

3. Storing and Preserving Jalapeno Peppers

You can store jalapenos at room temperature for two weeks. Freezing or pickling jalapenos can store them for a long time. To freeze jalapenos, wash and dry them thoroughly. Then cut them into chop them. They can last six months in the freezer.

To pickle jalapenos, wash and dry them. Then slice jalapenos. Place them in a jar. You can add spices for extra flavor. For example, garlic or dill. Store the jar in the fridge for two months.

You can also dehydrate jalapenos to preserve them. They will last for six months. You can also grind dried peppers in a blender or spice grinder. Then, add the jalapeno powder to dishes as a flavorful. For example, soups, stews or marinades.

XI. Troubleshooting Common Issues

1. Common Problems

Yellowing Leaves: Gardeners will face yellowing leaves when growing jalapenos in pots. various reasons can cause this. For example, over-watering, nutrient deficiency, pests or diseases.

Wilting: Another problem is wilting of the plant. Under-watering, root damage or exposure to extreme temperatures can cause this.

Stunted Growth: If your jalapeno plants lack sunlight, poor soil quality or insufficient nutrients, they will not grow as expected.

2. Solutions and Tips

Yellowing Leaves: To address yellowing leaves, make sure you are not over-watering your plants. Allow the soil to dry out between waterings to prevent root rot. If the issue persists, it could be a nutrient deficiency. Consider using a balanced fertilizer specifically designed for peppers.

Wilting: Proper watering is key to preventing wilting. If your plants are exposed to intense sunlight, consider providing some shade. Or moving them to a spot with less direct sunlight.

Stunted Growth: Ensure jalapeno pepper plants in pots get at least 6 hours of direct sunlight daily. You should use well-draining soil with organic matter. You should fertilize jalapenos every 2-3 weeks.

XII. Conclusion

How to plant jalapenos in a pot? Growing jalapeno peppers in containers can enjoy fresh peppers at home. We have discussed the benefits of container gardening and the steps to successfully grow jalapenos in a pot. When you gain experience and see your peppers thrive, it becomes a fulfilling and enjoyable hobby.