(Fall 2018)
Project Goal:
To create a Raspberry Pi Network Attached Storage Drive. This project was made for a Computer Networking class.
Uses/benefits:
- The NAS would be used in the students dorm room to hold files and students can place large files such as school work, backups and music on the drive.
- It would be cheaper than getting a cloud subscription to amazon
Disadvantages:
- The NAS is only accessible within a certain radius from the device, but since the intended use is for a dorm room it gets the job done.
Technology Aspects:
- Secure Shell (SSH)
- SAMBA/ Server Message Block networking protocol
- 802.11g (2.4GHz)
- NTFS
- Drive Mapping and Mounting
- IP ranges
Materials used:
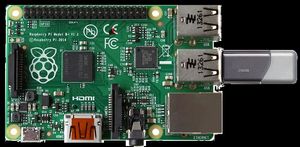
- Raspberry Pi B+ with built in wifi
- 32GB sd card for OS
- 16GB flash drive for storage drive
- Mobaxterm (macs have built in ssh)
There were two phases to the project:
- mounting the drive and creating an smb server
- turning the Pi into a standalone wifi hotspot
Phase 1:
$ sudo apt-get update
$ sudo apt-get install samba samba-common-bin
$ sudo apt-get install ntfs-3g
$ sudo mkdir /EXTERNAL //Making folder for External drive
$ lsblk
$ sudo umount /dev/sda1
$ sudo mount /dev/sda1 /EXTERNAL/
$ sudo nano /etc/samba/smb.conf // Here we modify the properties of the external file
(inside the file)
[EXTERNAL]
comment = external Files
browseable = yes
path = /EXTERNAL
writeable = Yes
create mask = 0777
directory mask = 0777
browseable = Yes
public = yes
$ sudo /etc/init.d/samba restart
Phase 2:
$ sudo apt-get update
$ sudo apt-get upgrade$ sudo apt-get install dnsmasq hostapd
$ sudo systemctl stop dnsmasq
$ sudo systemctl stop hostapd$ sudo reboot
$ sudo nano /etc/dhcpcd.conf
interface wlan0
static ip_address=192.168.4.1/24
nohook wpa_supplicant$ sudo service dhcpcd restart
$ sudo mv /etc/dnsmasq.conf /etc/dnsmasq.conf.orig
$ sudo nano /etc/dnsmasq.conf
interface=wlan0 dhcp-range=192.168.4.2,192.168.4.20,255.255.255.0,24h // the ip ranges available to be assigned every 24 hours
$ sudo nano /etc/hostapd/hostapd.conf
//The actual settings for the access point
interface=wlan0
driver=nl80211
ssid= PiFihw_mode=g //2.4Ghz
channel=7
wmm_enabled=0
macaddr_acl=0
auth_algs=1
ignore_broadcast_ssid=0
wpa=2
wpa_passphrase=****** // your password
wpa_key_mgmt=WPA-PSK
wpa_pairwise=TKIP
rsn_pairwise=CCMP
$ sudo nano /etc/default/hostapd
DAEMON_CONF=”/etc/hostapd/hostapd.conf” //this line was commented out it took us an unfortunately long time to figure that out.
sudo systemctl start hostapd
sudo systemctl start dnsmasqnet.ipv4.ip_forward=1
$ sudo iptables -t nat -A POSTROUTING -o eth0 -j MASQUERADE
$ sudo sh -c “iptables-save > /etc/iptables.ipv4.nat”
iptables-restore < /etc/iptables.ipv4.nat
$ sudo reboot
ssh pi@192.168.4.1 //whatever IP You set earlier
After these steps you should be able to connect to the Pi’s wifi, map the external drive, and ssh to the PI.