Internship application season is well underway for journos, with most internship deadlines already passing on the first of November. However, plenty of publications are still looking for interns for the summer. You might have seen that a lot of applications call for portfolio websites, even for non-multimedia journalists. Don’t fret, making a portfolio is much easier than you might think! I’m here to take you through it step-by-step, and the end result will hopefully be a portfolio that showcases all of your skills and accomplishments as an aspiring journalist.
Step 1: Create it!

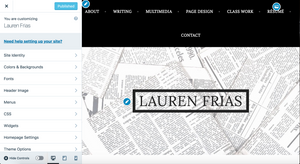
As you can see above, welcome to my portfolio, laurenfrias.wordpress.com! For starters, pick a content management software (in layman’s terms: a website creator) to begin building your website. My personal preference was WordPress, as I had used it before to create blogs, but other popular websites include Wix and Squarespace. Once you find the best CMS for you, it’s time to name it! This is the easiest part. It’s just your name! You’ll find yourself at a disadvantage if the domain is already in use, but if that’s the case, consider using your middle initial or middle name as a whole to differentiate. You can go the extra mile and buy your domain name (for a small monthly fee depending on the website creator that you choose), and you’ll become the new sole owner of yourname.com. Congrats, now you have a website!
Step 2: Customize it!


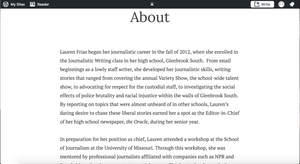
No, this is not a reiteration of the last step. Once you get the website to an aesthetic that you approve of, it’s time to really make it your own. That is, it’s time to showcase yourself as a journalist and make this portfolio a summation of what you’ve accomplished in your career thus far! That being said, make sure to write a concise About Me page with a short bio about yourself, kind of like how you would write in the introductory paragraph of a cover letter. Your portfolio is also a good place to keep an updated copy of your resumé for recruiters to find it to either screenshot or download for themselves, say in the instance that the file that you supplied was corrupted or it was not the most recent version. You should also include a Contact Me page, listing an email that you can be best reached at and a phone number. Be careful how you format it, however; there are lots of internet bots that can skim your phone number and email off your website and flood your inbox and voicemail with spam. One way that I’ve avoided it is through differentiating the typical email format (i.e. youremail (at) gmail (dot) com) or simply omitting the information as a whole.
Step 4: Upload it!

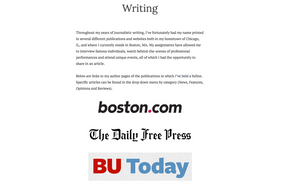
As you might have seen in the title of this blog, this is your career in a nutshell; I only emphasize this point because it’s important not to make your portfolio a complete timeline of your experiences. Instead, it highlights the best parts of your past experiences and shows your potential employer in five minutes or less what you may have accomplished in five years, or whatever the case may be. In my opinion, I would upload your top five to seven clips of your best work from each of your past internships, and maybe even less so depending on how much experience you have. On my portfolio, I provided links to my work on the original publication’s website, unless the article was blocked by a paywall, in which case I would create a downloadable file that had a PDF of the headline, text, publication, and date of publication. Make sure to create parent pages and child pages to easily organize your clips into a navigable structure.
Step 5: Update it!
